How to use the Link Scanner?
Before you can use the Link Scanner service, make sure that you have the latest version of the plugin installed. You can download the latest version anytime from your dashboard.
You will also have to have at least one credit available. The number of credits depends on your purchase.
- Go to Settings -> 301 Redirects PRO -> Link Scanner,
- Click on the “Check & Analyze all site’s Links” button.
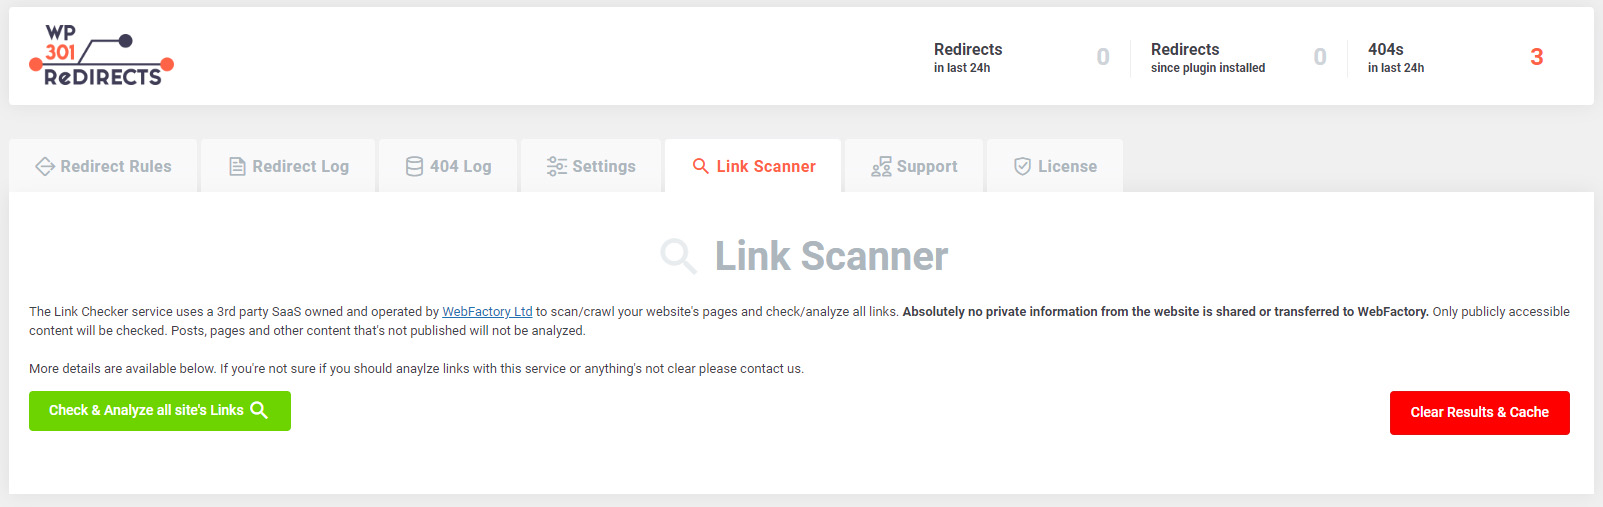
After you click the button, please allow a couple of minutes for the Link Scanner to go through your entire site. The speed of the scanner depends on the number of posts & pages you have on the site, as well as on the number of links you have on average. So, if you have a lot of them, please allow a couple of minutes for the scanning process to be completed.
Feel free to work on your WordPress site while the scanner is working. No matter what you do on your site, the scanner will work in the background, and you can revisit the Link Scanner settings page later.
Once it’s done, you will be able to check out the results.
The Link Scanner Results
After the scan process is done, you will see a list of all scanned posts & pages sorted in the table. The scanner will let you see the number of:
- Total pages scanned,
- Total links found,
- Total problematic links.
The table can be sorted by the page title, pages with errors first, or those with the most links.
If you know what page you’re looking for, you can always locate the search option in the top-left corner of the table. Type in what you’re looking for, and the Link Scanner will show you the page so you can further analyze it.

Details
Each row in the table represents one page on your blog that was successfully scanned.
On the left-hand side of the table, you will find the name of the page and link to, so you can quickly open the affected page.
The right-hand side shows you the number of scanned links, as well as the number of outgoing links that passed the test. Probably the more interesting information is the number of links that didn’t pass the test.
If you want to learn more about the problematic links, you should click on the “Open Details” button.
Link Details
After scanning your site for problematic outgoing links and seeing the results, you can show details for each scanned page.
How to see details about each link?
Click on the “Open Details” next to the page you want to inspect more closely. This will open a new window with the details about all the links. The problematic links will be located on the top, and you can recognize them by the red link icon located on the left-hand side of the screen.
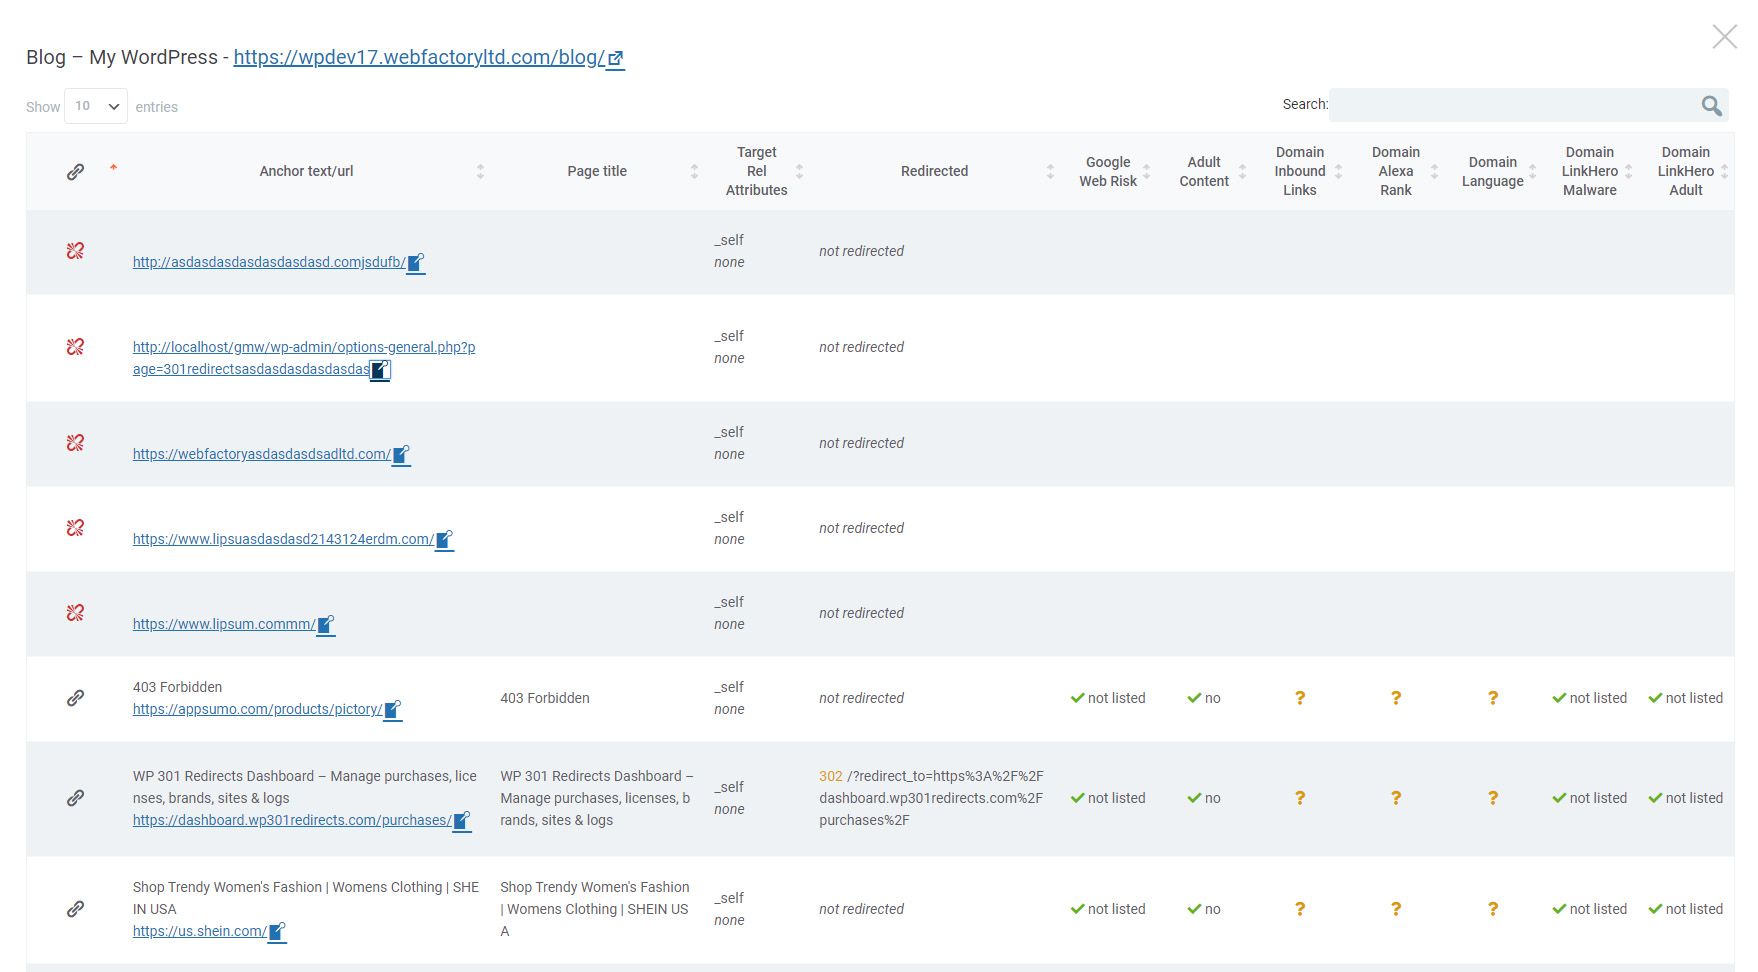
Besides the icon that indicates problematic links, each row will display the following stats for each outgoing link:
- Anchor text/URL
- Page title
- Target rel attributes
- Redirect status
- Google Web risk
- Adult content
- Domain inbound links
- Domain Alexa rank
- Domain language
- Malware status
In order to isolate any of the scanned links, simply click on the icon next to the anchor text/URL. It will open your post or page and show you where the link is located. This will allow you to quickly find the problematic link and replace it, redirect it, or do anything you want with it.
Credit Quotas and Logs
Depending on your purchase, i.e. your active WP 301 Redirects plan, you may have recurring or one-time credits that you can use for scanning the sites.
- Recurring credits reset on every 1st of the month, and you can scan your site that number of times every month.
- One-time credits do not reset every month. Each credit can be used only once.
To better understand how many credits you have left, as well as to see the detailed scanning log, please open your Dashboard and click on the Link Scanner tab.
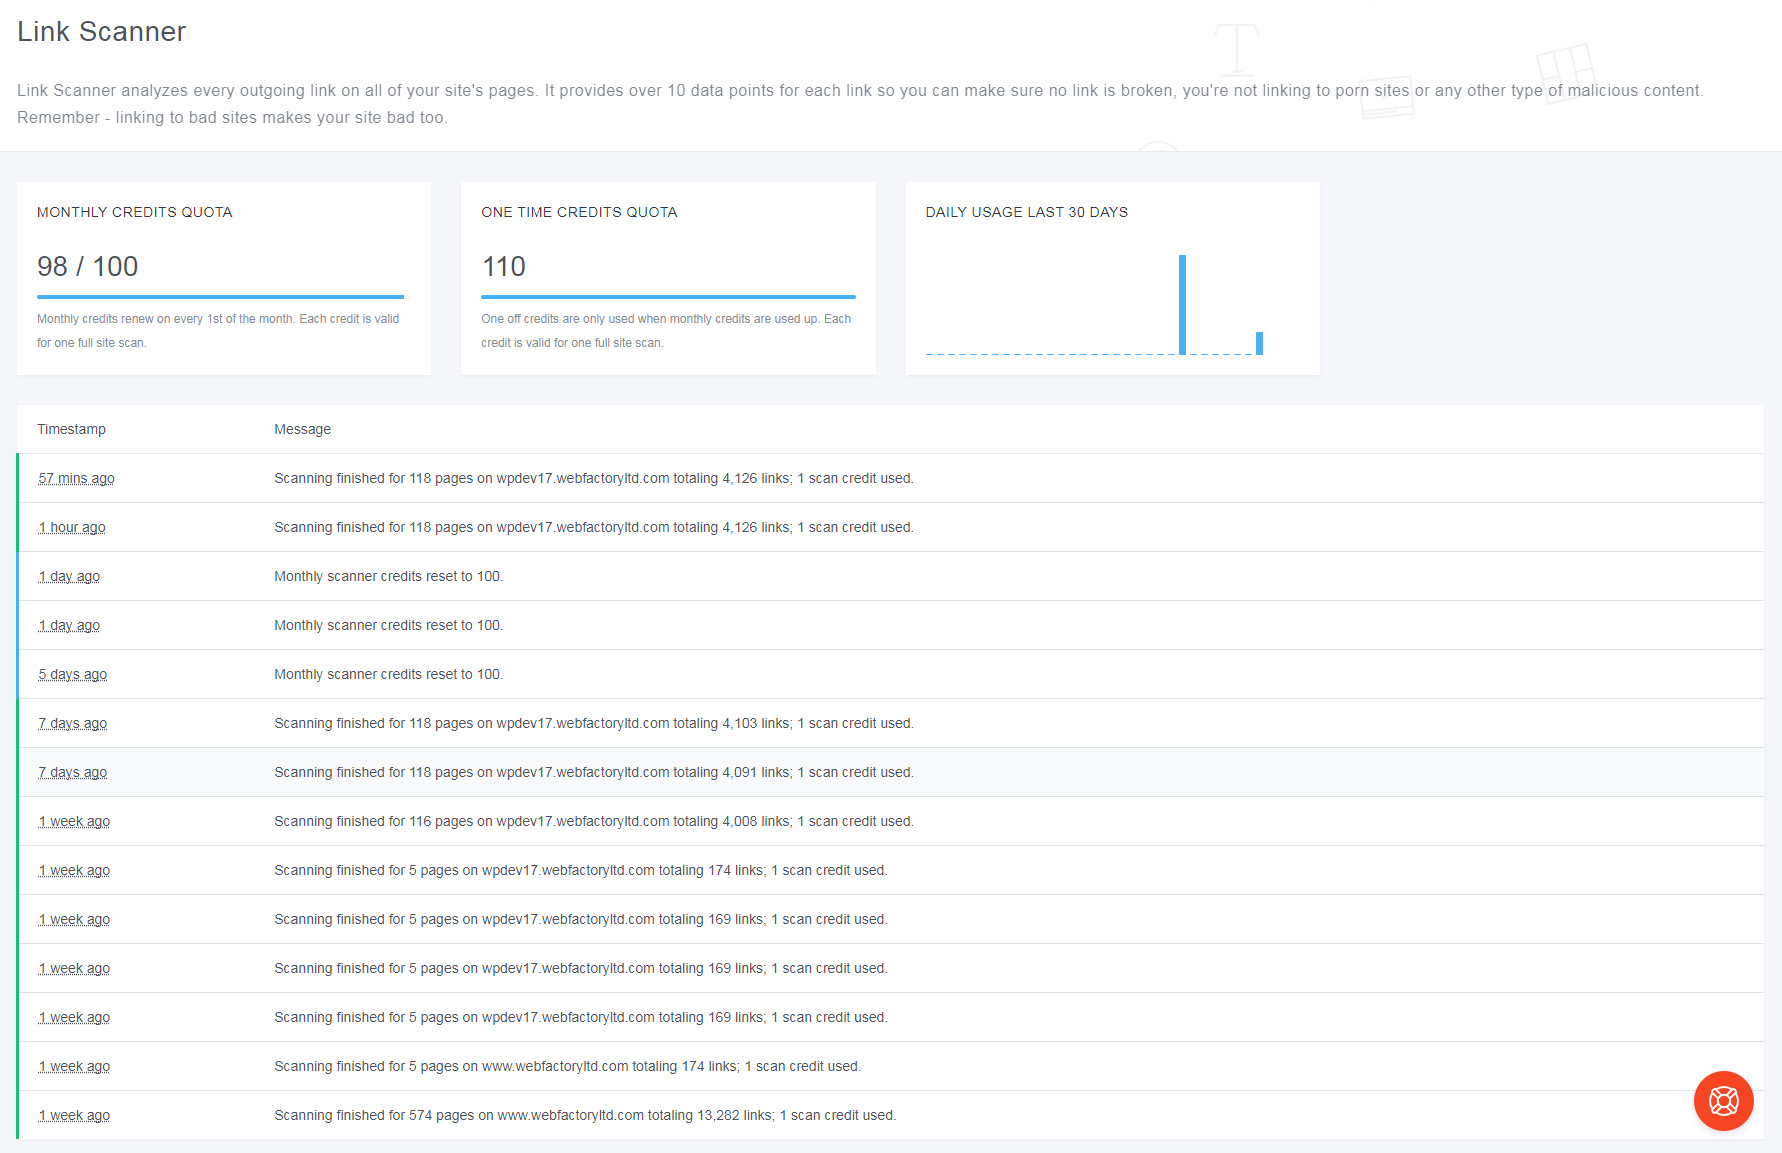
Just in case a scan fails for any reason, your credits will not be used. You will lose a credit only after a successful scan.
How do you get Link Scanner credits?
Depending on your purchase, you should already have either monthly recurring credits available or one-time credits that you can use for scanning your site for problematic links.
Since we have just rolled out the new feature, it is not possible to purchase credits yet.
We are working on it as we speak and should have more details soon.
Just in case you are already using WP 301 Redirects but do not have any credits available, please contact us, and we will throw in free credits for you to try out the Link Scanner.