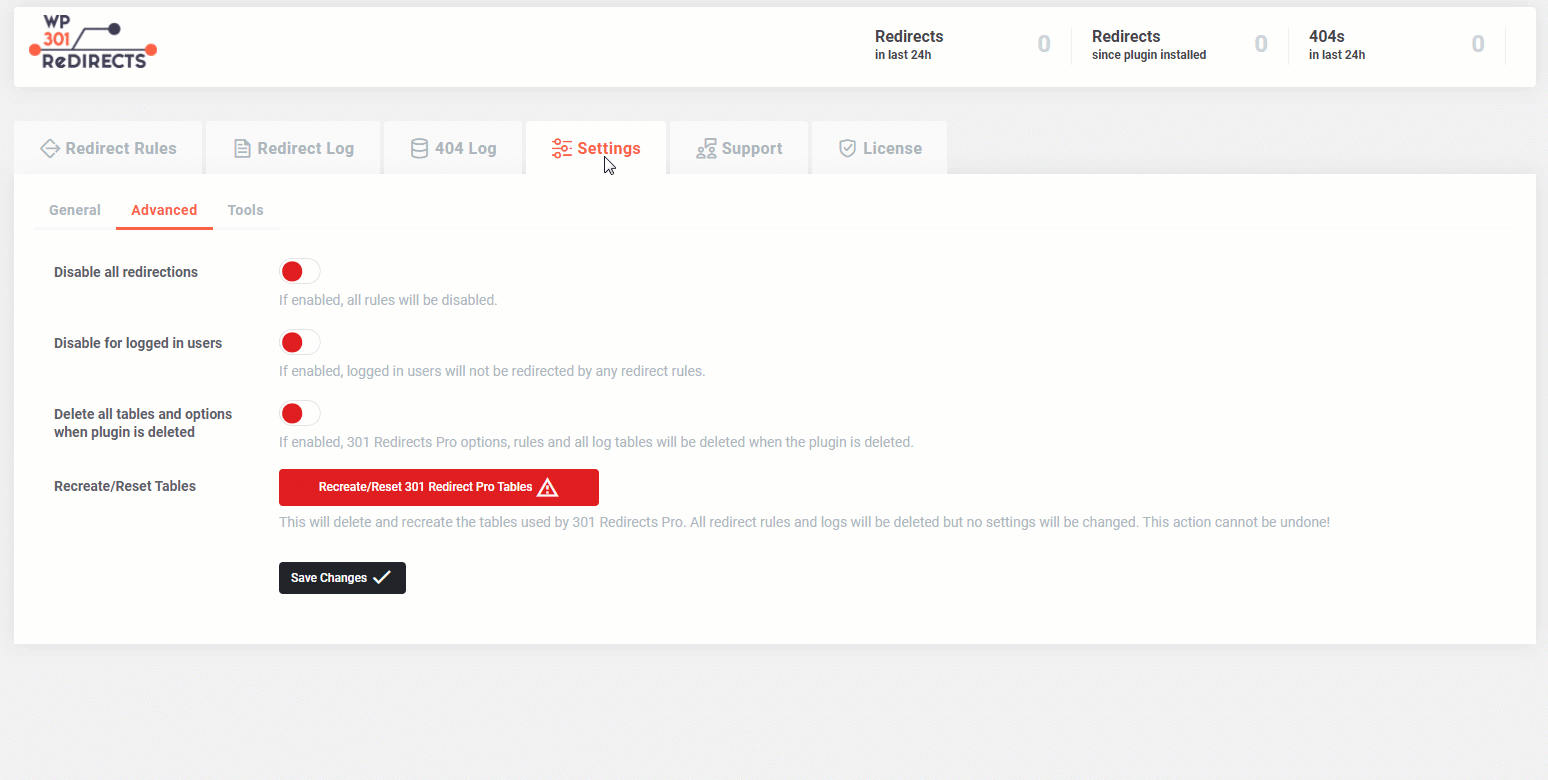
Disable all redirects
If you need to stop all redirect rules, you do not have to turn them off one-by-one.
Simply navigate to Settings -> Advanced, and choose to disable all redirect rules. Save changes.
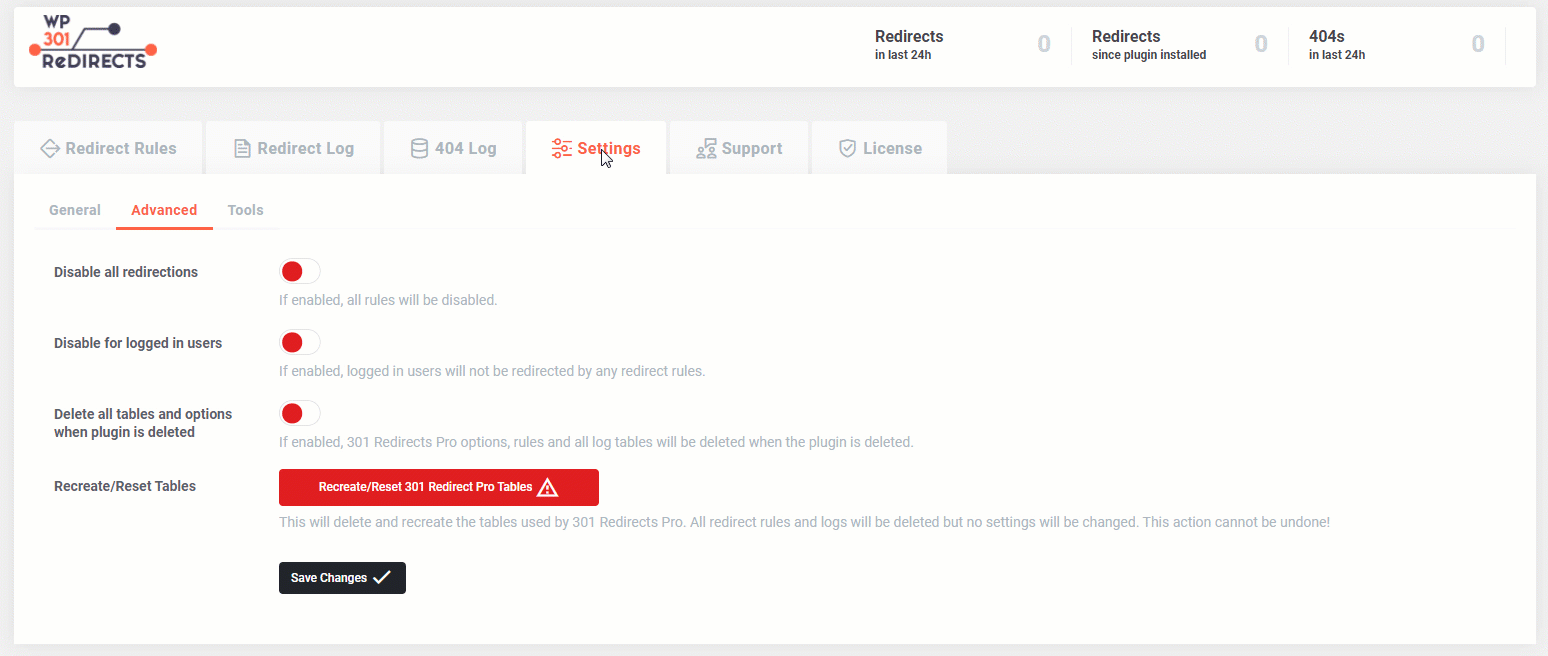
Disable for logged in users
By default, all redirection rules are applied to all the users of your website.
However, you may decide to have these rules working only for people who are not logged in to your website. If you turn on the setting (green), all users who are logged in will not be affected by the redirection rules created with WP 301 Redirects.

Don’t forget to click the “Save Changes” button when you change the setting.
Delete all tables and options when plugin is deleted
If you decide to delete the plugin, this option allows you to completely remove everything that was done by the WP 301 Redirects plugin.
- Go to Settings -> 301 Redirects
- Open the Settings tab and choose “Advanced”
- Find the “Delete all tables and options when the plugin is deleted” option
- Turn the setting on or off
- Save changes
If enabled, 301 Redirects Pro options, rules, and all log tables will be deleted when the plugin is deleted. This will leave you with a clean database and no traces of the WP 301 Redirects plugin.
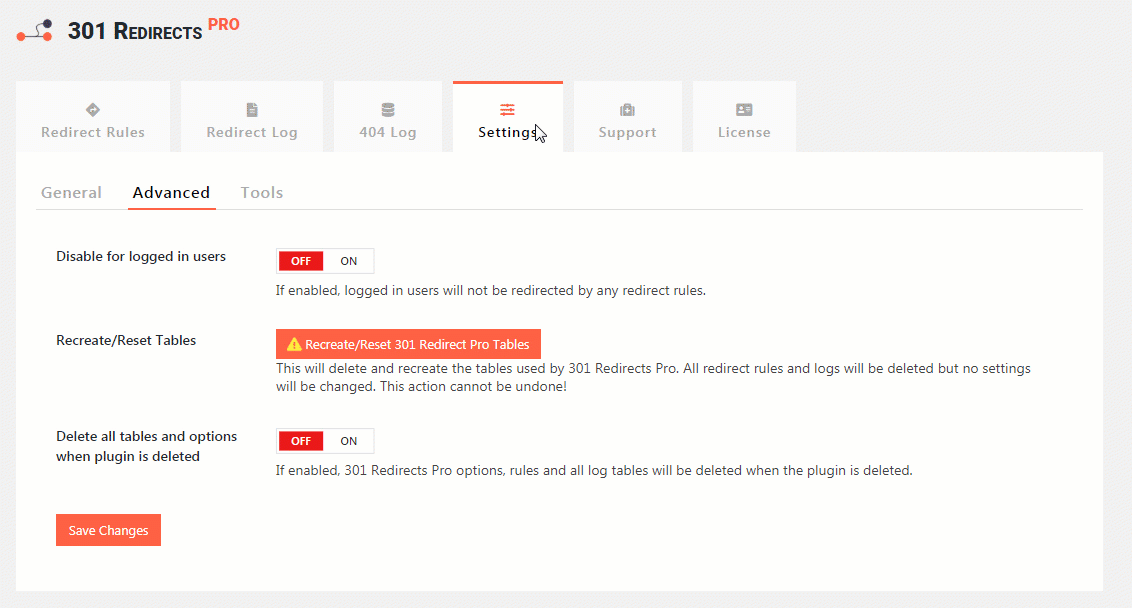
Recreate/Reset Tables
If you decide to start over, there’s no need to reinstall WP 301 Redirects. To quickly reset the database tables created by the plugin, you simply need to click a button:
- Go to Settings -> 301 Redirects
- Open the Settings tab and choose “Advanced”
- Click the “Recreate/Reset 301 Redirect Pro Tables” button
- The popup will emerge, asking you to confirm this. Click the “Recreate tables” button to confirm.
This will delete and recreate the tables used by 301 Redirects. All redirect rules and logs will be deleted but no settings will be changed. This action is not reversible!
Import and Export Redirects
If you have created multiple redirect options, recreating them would take a lot of time. That’s why you can quickly export all of your redirects so you can import them back where & when needed.
How to Export Redirects?
- Go to Settings -> 301 Redirects
- Open the Settings tab and choose “Tools”
- Click on the “Download Export File” button
By clicking on the button, you will download a CSV file that contains all of your redirects. This file can be used as a backup copy so you can restore it if needed, or you can import the redirects to another site (for example, if you’re working on a local or staging site and want to export redirects to the production website).
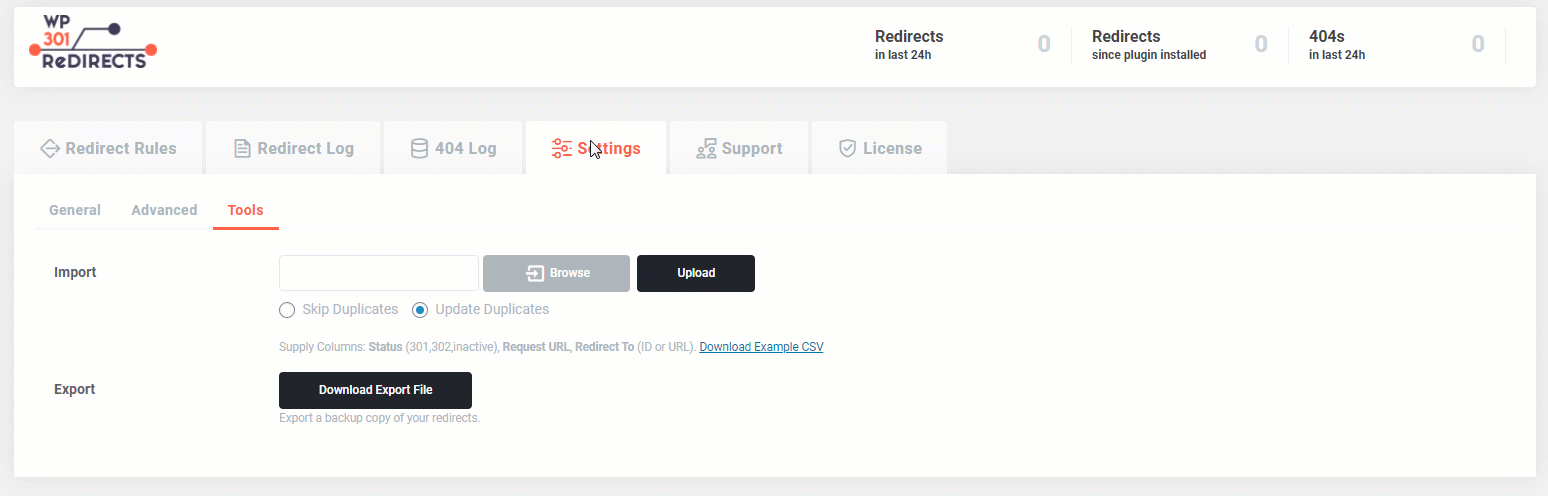
How to Import Redirects?
- Go to Settings -> 301 Redirects
- Open the Settings tab and choose “Tools”
- Click on the “Browse” button and select a file that contains your redirects
- Choose if you want to skip or update duplicate redirects
- Click the “Upload ” button to start the import process
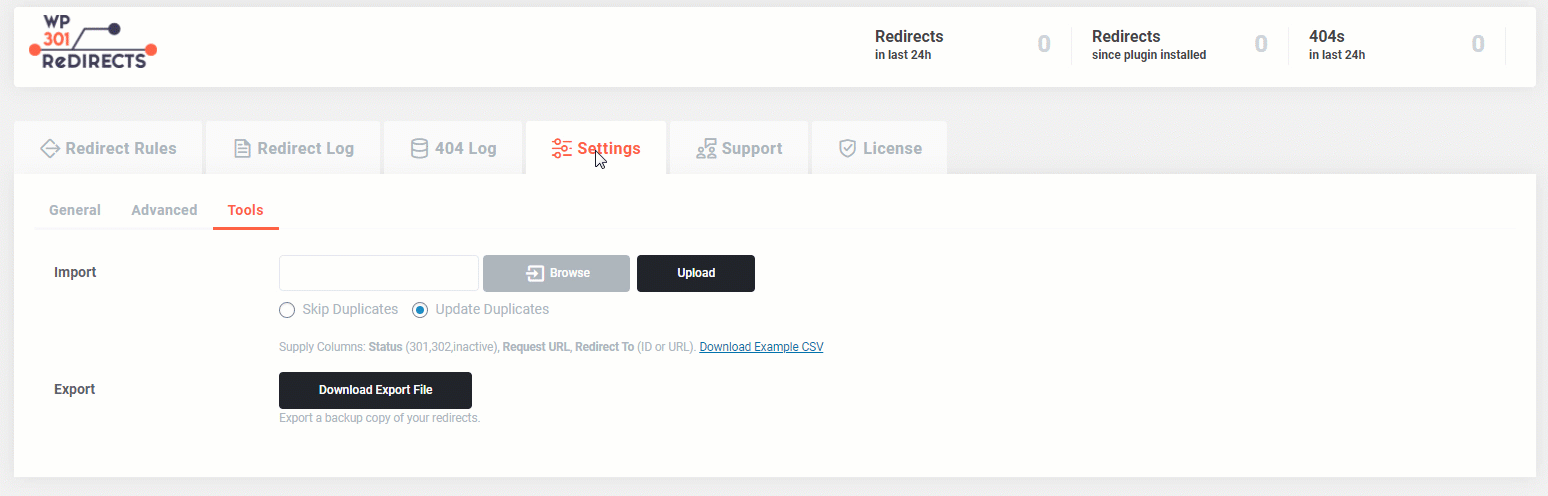
If you’re creating a CSV file on your own, or have a CSV file that wasn’t exported by the WP 301 Redirects plugin, you will have to make sure you supply all the needed columns: Status (301,302, inactive), Request URL, Redirect To (ID or URL).
To make sure you’re working correctly, you can download the example file by clicking on the provided link below the “Upload” button.